Are your Purple Martin nestlings about 10-15 days old? It’s probably time to do a nest change! Purple Martins are in their nests long enough that pests like mites, blowfly larvae, and other blood-sucking insects have time to become a real problem in the nest. Doing a nest change can make a dramatic difference in the health of the nestlings, and even improve their chance of survival and fledging.
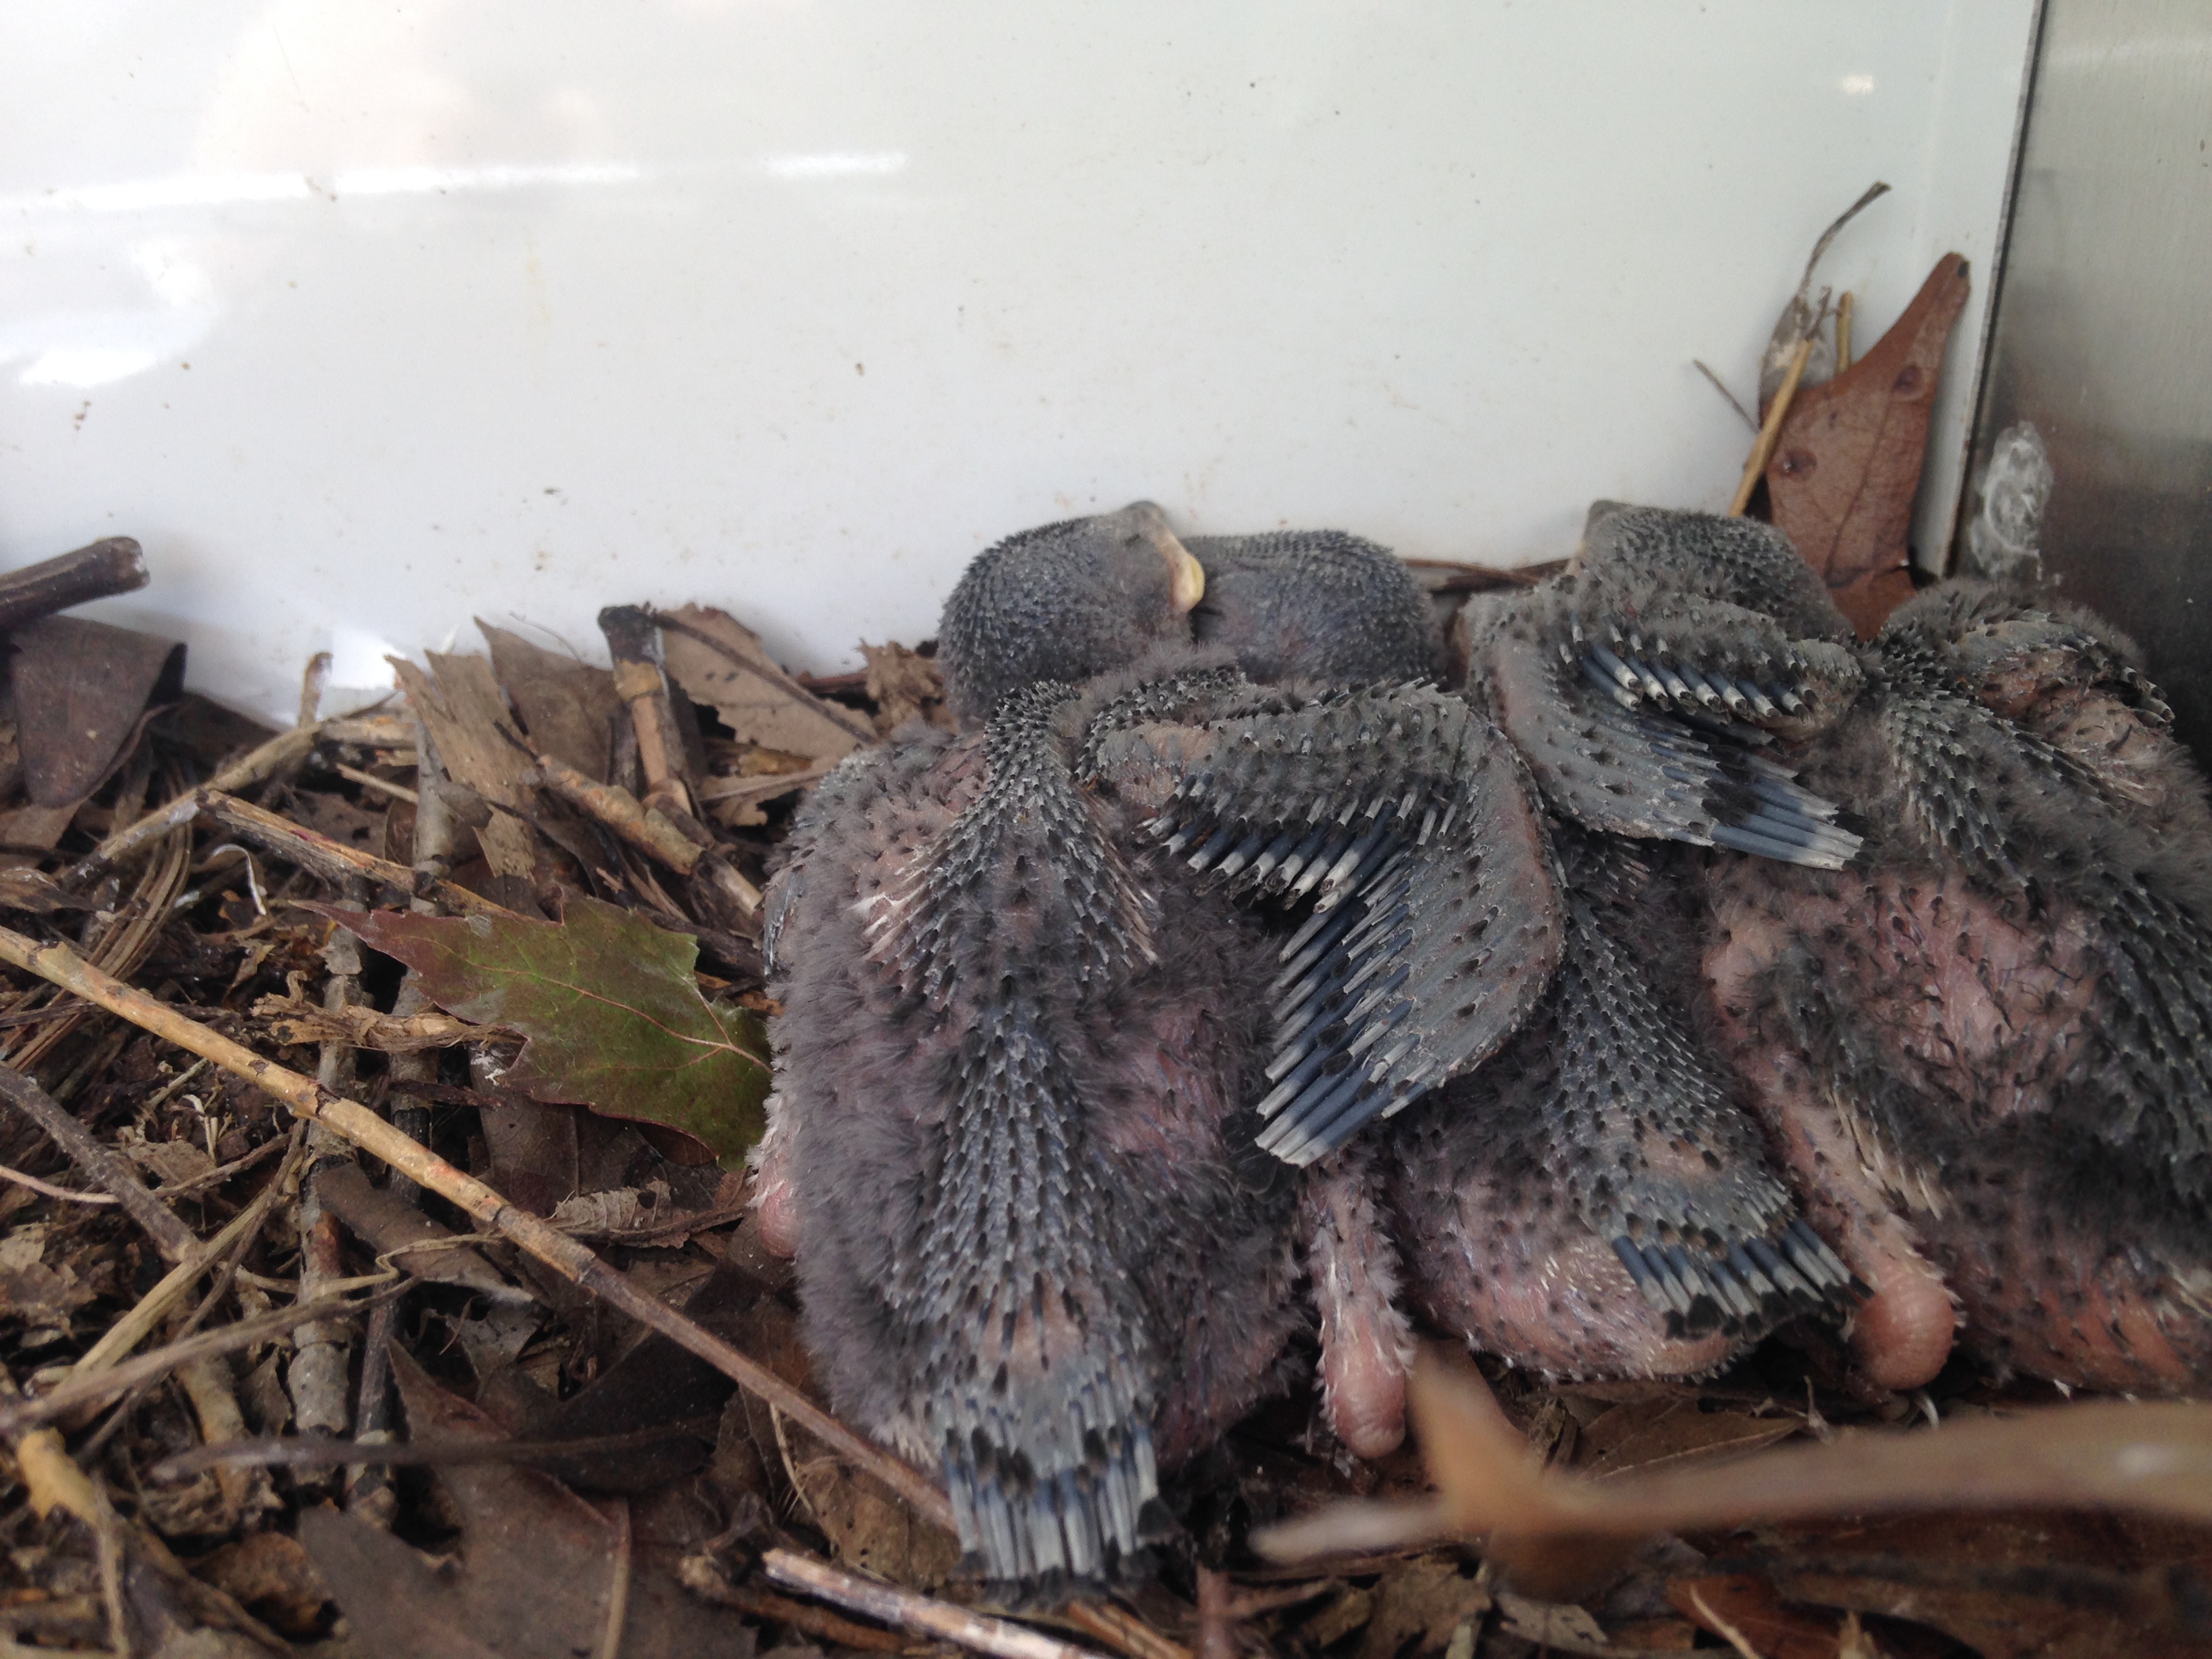
Purple Martin nestlings in original nest (before nest change)
In the 1980s, Purple Martin Conservation Association found that in martin nests with parasites, only 44% of nestlings survived to fledge successfully, whereas in nests without parasites, 84% of nestlings fledged successfully. How do we reduce the number of parasites in a nest? We do not want to use pesticides, which besides being illegal can also harm nestlings, so instead we manually take out and replace the nest materials. When you do a nest change, you clean out all the original nest material (and parasites such as blowfly larvae, mites, martin fleas, or swallow bugs – none of which will harm humans!) and replace it with fresh, clean material (cedar shavings and pine needles). Easy, right? Yes! And you don’t need to be afraid of harming the nestlings or “messing up”. Purple Martins will not abandon their nests or young if you touch the young.
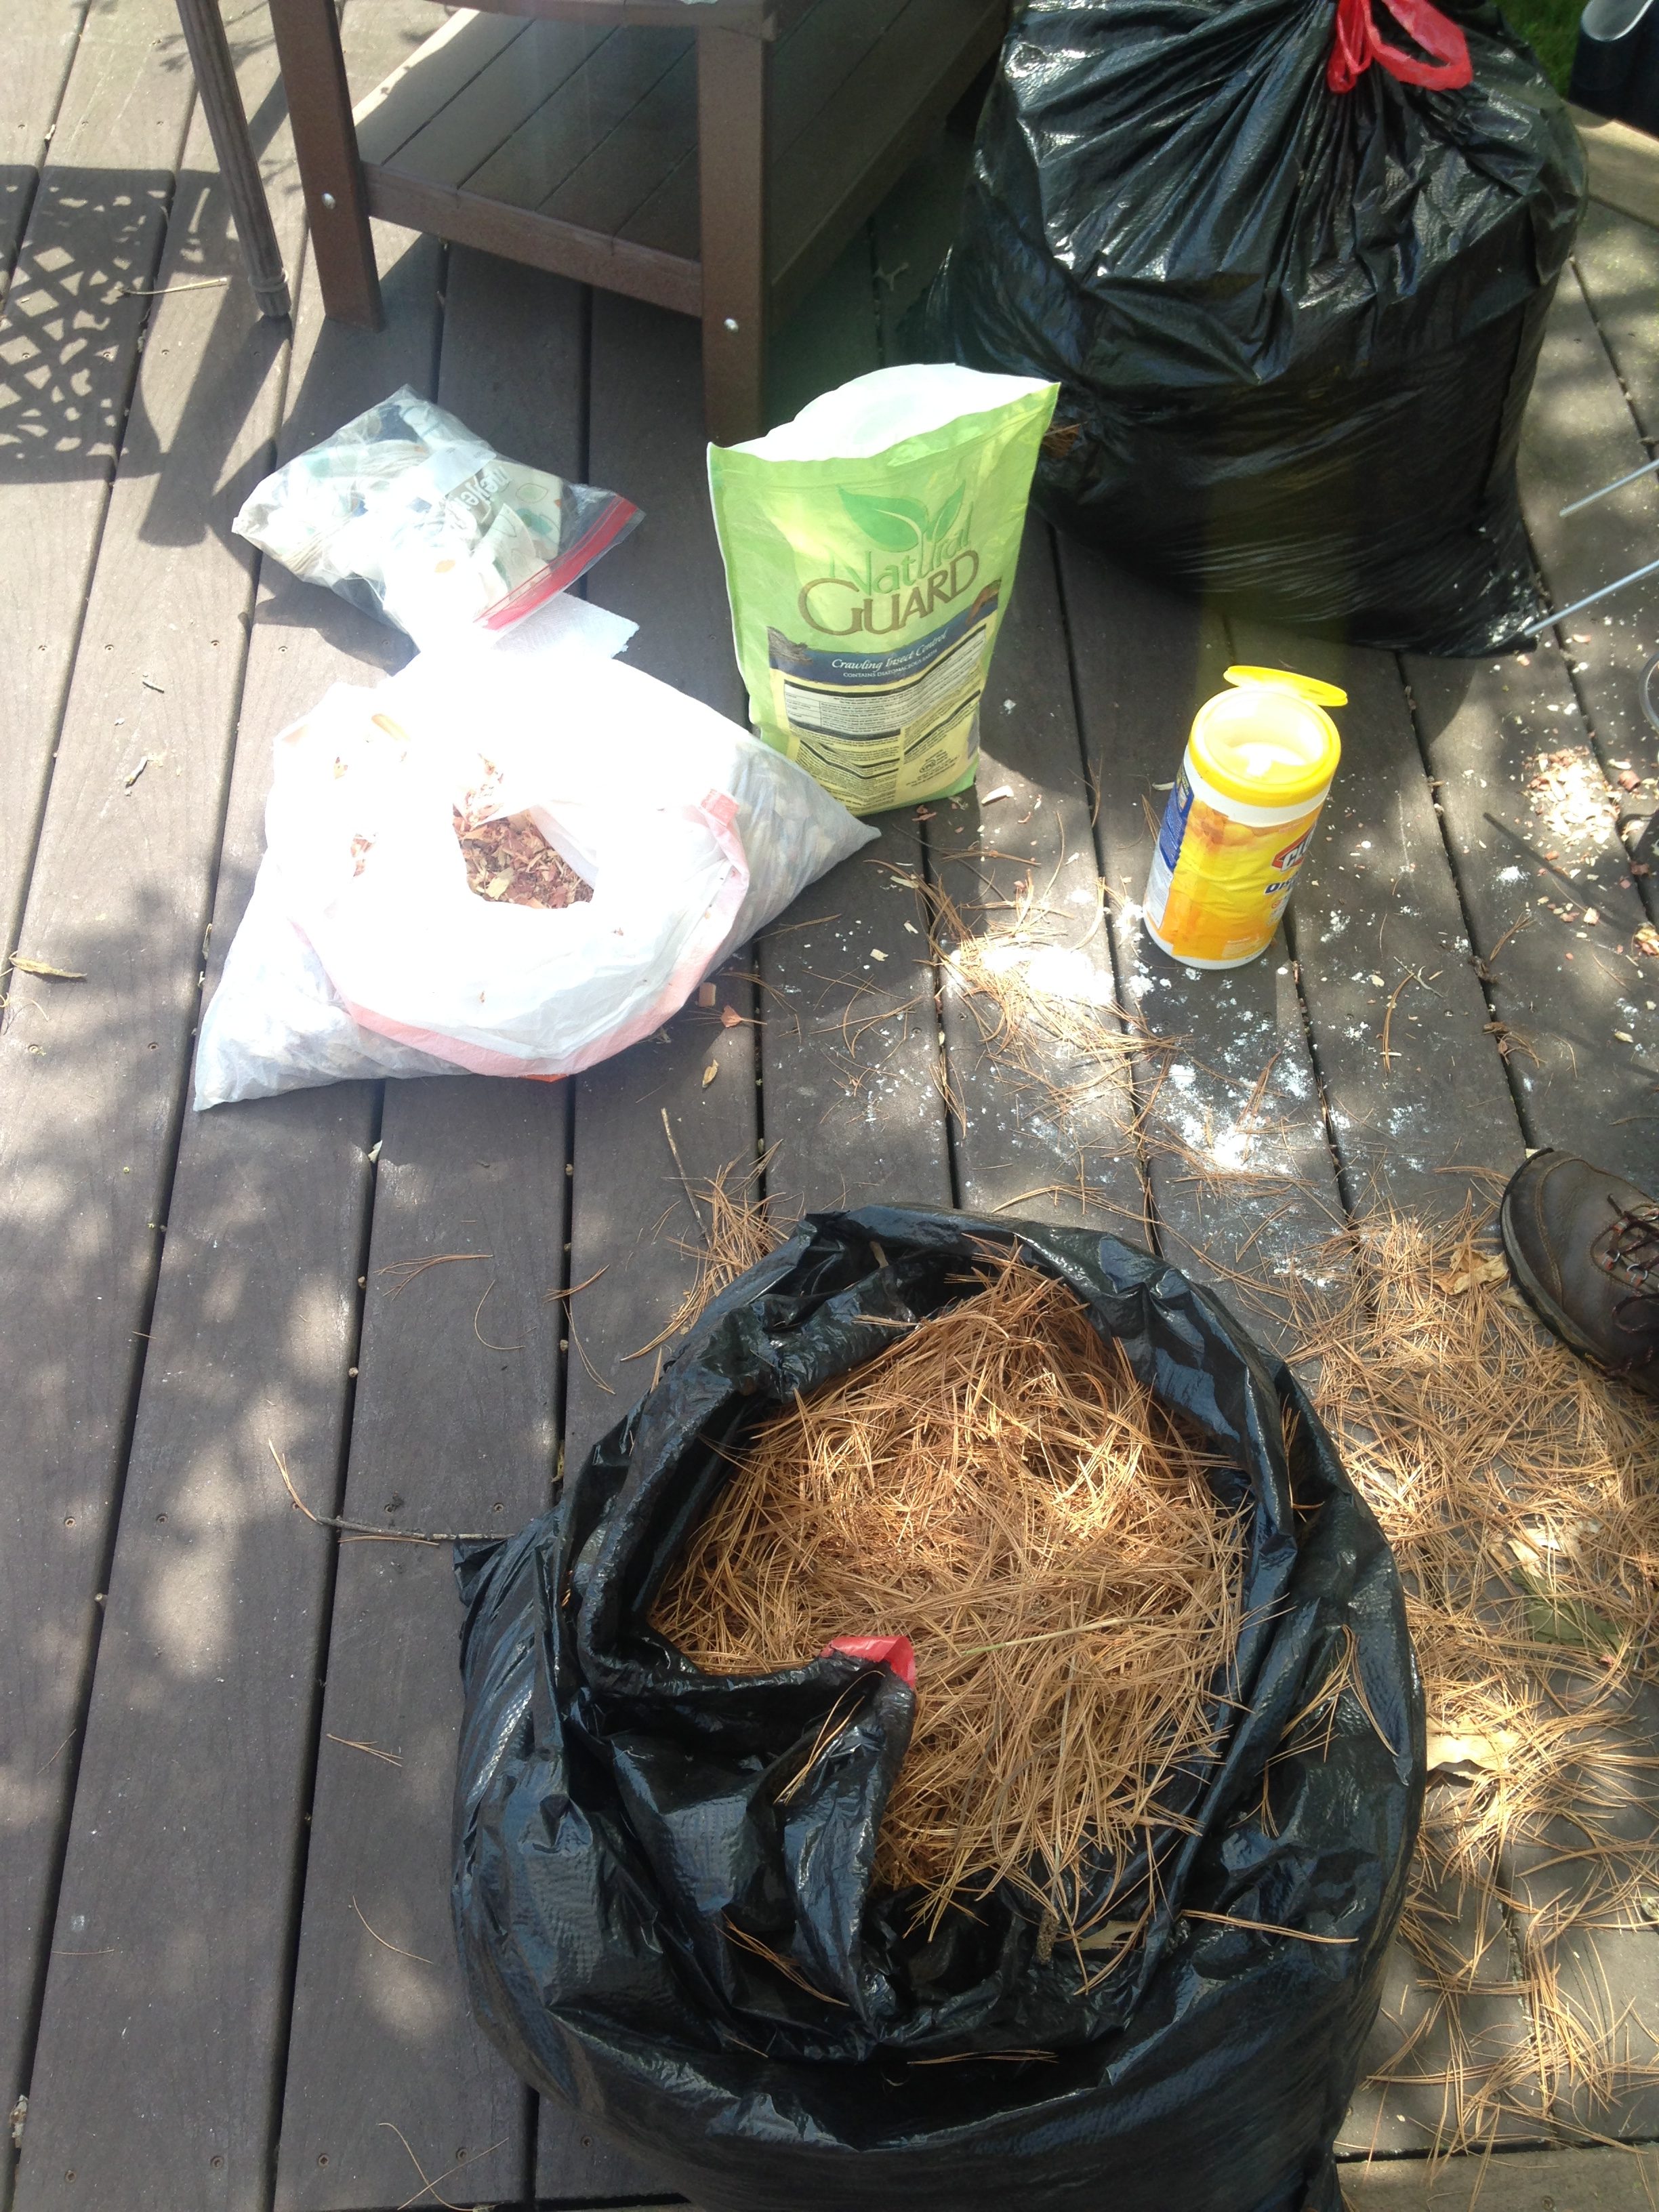
Nest change supplies: paper towels/wet wipes, dry pine needles, cedar shavings, trash bag to collect and dispose of old nest material
Six simple steps to follow for a nest change:
- Gather your equipment and materials:
• Deep, 5-gallon bucket
• Wet wipes or soapy water and paper towels
• Putty knife to scrape out nest debris
• A container for the old nest material (another bucket)
• Cedar wood shavings (NOT sawdust!)
• Dry white pine needles (you can gather these from under a white pine tree)
• Fresh green leaves (from maple, elm, birch, or other tree/shrub with “soft” leaves) - Remove nestlings from their cavity and place into the deep bucket with wood shavings at the bottom. You can cover the bucket with a small towel to keep sun off the nestlings while they are inside. To keep the bucket clean (if you are changing multiple nests), allow each nestling to “poop” after you remove it from its nest cavity, prior to placing it in the bucket.
- Reach into the gourd cavity or into the house compartment and pull out the entire nest. You can use a putty scraper here to scrape blowfly maggots from corners of a compartment.
- With wet wipes or a wet/soapy paper towel or rag, wipe the cavity walls and floor. You don’t need to seek out
every single nest mite, just do the best that you can within a minute or so. Dry well with paper towels. - Once the old nest and parasites have been removed, place 1-3 handfuls of soft wood shavings (cedar shavings work well) into the cavity or compartment, then spread white pine needles into the cavity – spread evenly across the bottom. Create a small depression in the needles or wood shavings, line with a small handful of green leaves. *Do NOT use sawdust as it soaks up moisture and will create an uncomfortable nest for the nestlings.
- Place nestlings into a huddle within the clean nest after checking each one over for attached blowfly maggots. If you find any, they can be gently removed by brushing them off with your finger. Don’t forget to look under the wings!
Dispose of removed nests when you are finished.
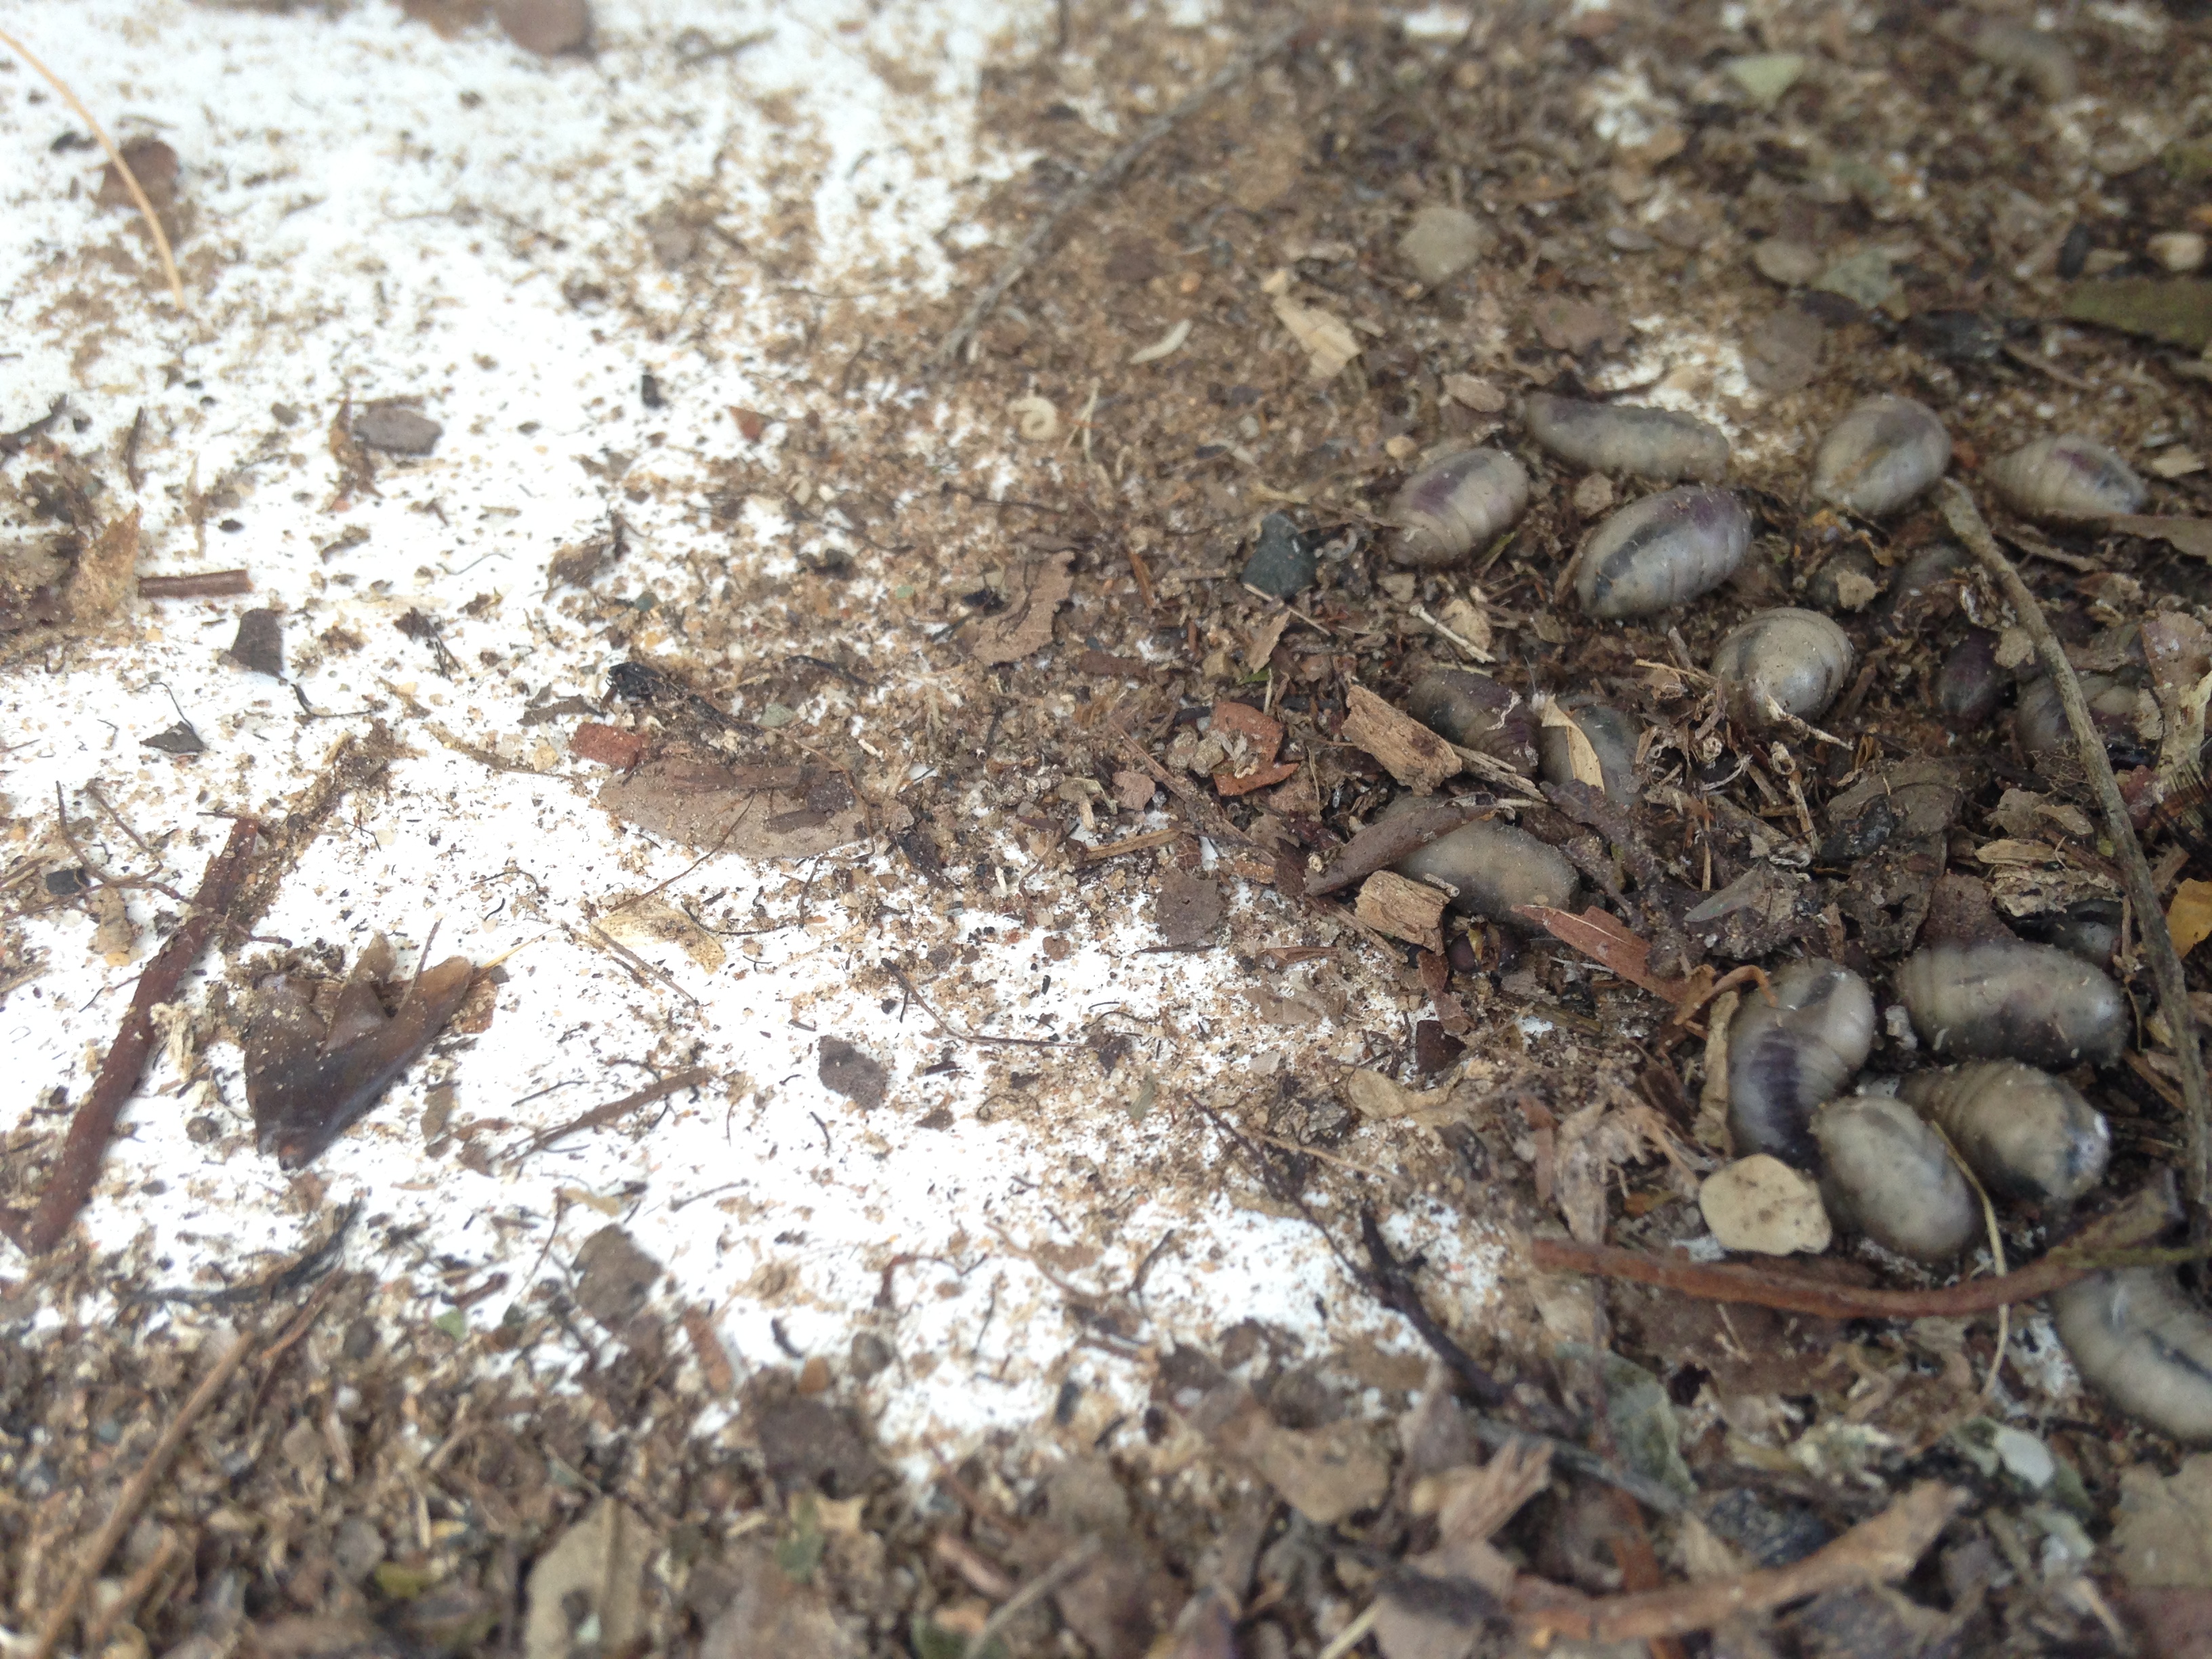
Blow fly larvae, seen on right hand side of image
For more details about performing nest changes, check out the resources listed below. This brief summary of nest change steps is a place to get you started with this next stage of being a proactive martin landlord.
Just as nest checks may have seemed daunting to you once, conducting a nest replacement may be even more so. But as with nest checks, so long as you keep the birds’ safety in mind, you will keep learning and become more confident as you go. If you have any questions at all, please reach out to the Facebook group (Michigan Purple Martin Friends), Michigan Audubon, or the Purple Martin Conservation Association.
Resources
Nest replacement guide from the Purple Martin Conservation Association. (Warning: graphic photo of blowfly larvae on a nestling on the first page!) This is a thorough look at identifying nest parasites and safely replacing infested or rain-soaked nesting material, two issues that can kill nestlings without intervention.
Nest change video (along with nestling banding by PMCA staff with a federal permit for banding birds); go to approximately 6:25 into the video to hear why we should do nest replacements!
A few final tips
- Wear long sleeves and pants and consider wearing a dust mask especially if you are replacing many nests, as it can be dusty!
- Nest mites and feather lice can crawl onto you, but they are not harmful to humans (only annoying!).
- Never attempt to do more than one nest change at a time – you don’t want to mix up which nestlings came from which nest! Try to be quick – aim for about 3-5 minutes per nest at most.
- Avoid changing a nest on days with poor weather; the best time of day is the afternoon.